Installation instructions

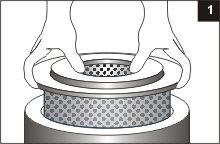
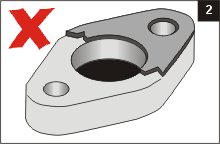
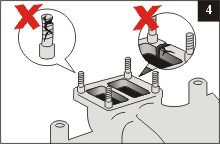
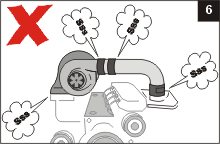
As a highly sophisticated piece of modern technology, a reconditioned turbo should be handled by professionals with extensive knowledge and experience in the subject of rebuilds and repairs. Any incorrect modifications introduced, mistakes made during installation (e.g. incorrectly connected pipes) might result in serious damage both to the turbine and the whole engine.

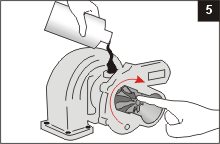
One of the crucial stages during turbo repairs is locating, diagnosing the reason of the part’s failure and eliminating it prior to installation.

guideline_1

Thoroughly inspect and clean (if needed) the intake system, replace the air filter as even minimal amount of dirt might result in damage of the part. To ensure precise fit and reliability, only OEM parts, recommended by manufacturers, should be chosen and used during the repair.

guideline_2

Inspection of the oil system should be performed. It should be tight, without any leaks and the flow of oil should not be obstructed in any way. Additionally, to prevent leakage in the future, turbocharger’s grease system seals should be checked and replaced if any signs of deterioration and/or damage is observed.

guideline_3

Engine oil and oil filter should be changed. As always, only factory recommended elements should be selected for the procedure.

guideline_4

When simply mounting a recon turbo (with no additional reconditioning or rebuilding work conducted), use new seals only for the collector. Also make sure to use special screws, designed for the exhaust system and resistant to extremely high temperatures of a turbocharger. Additionally, the collector requires inspection and cleaning – as even new part can be seriously damaged when a foreign matter (dirt) enters it.

guideline_5

Start by connecting the greasing system. To minimize the risks connected with so called “dry start” of the engine, pour clean engine oil directly to the turbocharger – there is a special slot in the upper part of the housing. Remember to twist the rotor during that procedure to help grease the whole system prior to engine start. After that, the rest of the connections should be installed in a correct sequence. Note that there should be no pressures on these connections at this stage.

guideline_6

Shut off the ignition and turn the kick-starter. This will allow to build pressure in the grease system. After that, the engine can be safely started. Note that no load should be on the engine for around 30 seconds after the engine has started. Inspect all connections, seals and mounting points to make sure they are tight and no leaks are observed.